You don’t upload the raw data BAM file of the NGS test to Yfull yourself, but indicate where it can be downloaded. You can get the link from the provider where you did your test. (FTDNA, YSEQ, FGC). Companies like Dante Labs don’t offer such a link for Yfull directly, so you have to make the required file accessible via a cloud.
This guide is simple and intended for those who have no experience but still want to transfer their data to YFull. Therefore only the simple methods are explained. The “more difficult” methods are only mentioned and not explained in detail.
1.0 WGS from Dante Labs
Basically it is recommended to use the BAM file hg38 for submission to the Y-tree of Yfull, but it is also possible to start the analysis with a BAM hg19 and upgrade to hg38, later.
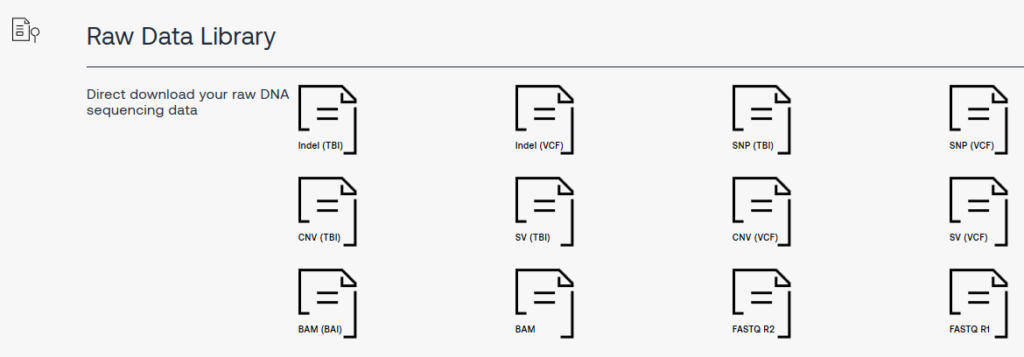
Download your data from Dante Labs and save it on your harddisc.
1.1 Submit BAM with hg19
1.1.1 Upload the entire file.
The entire file is very big, so this variant should only be used in exceptional cases. In addition, this file contains the entire autosomal DNA.
- Upload the files with the extensions BAM and BAI to a cloud.
- Share the folder and send the URL to YFull.
The file with the extension BAI is an archive file. With the help of this file YFull does not have to download the whole BAM, but is able to download only a selected sequence (Y-Chr).
1.1.2 Upload the “striped” BAM file, with just the Y-Chr section.
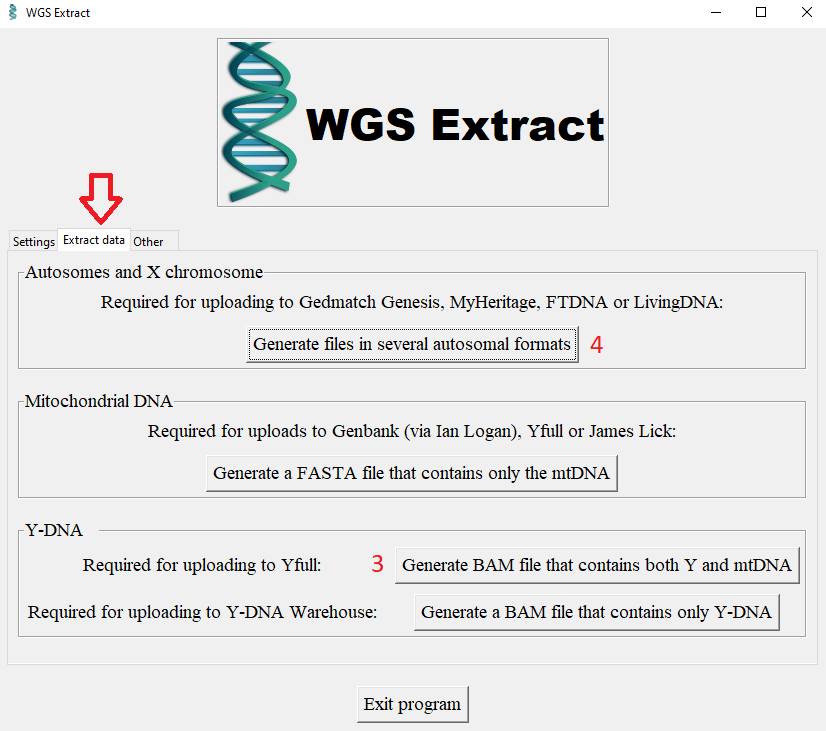
Or you can only extract the relevant areas from the BAM beforehand. This is done on Linux with the program Samtools. Users without experience in Linux and Samtools can use a tool called WGS-Extract, which runs on MAC and Windows and works with Samtools in the background. This program is very large (4.5 GB) because it contains the reference files for hg19 and hg38. The program recognizes the reference genome used and works with BAM hg19 as well as with BAM hg38.

- Download WGS Extract here and unzip.
- Start program with Windows_START.bat
- Select language German / English
- Select BAM file (1)
- Select output directory (2)
- Generate BAM file containing both Y and mtDNA (3)
- You can also generate files in different autosomal formats from a WGS-BAM with hg19. (4) These files can be used for uploading to Gedmatch.
- Upload the file #######_only_chrY_and_chrM.bam to a cloud
- Share the folder and submit the URL to YFull.
1.2 Submit the BAM with hg38
The preferred reference genome for YFull is hg38. You can either create this yourself, or have it created.
1.2.1 Let YSEQ create the BAM hg38.
The simplest method is to have YSEQ prepare the file for you.
- The product of YSEQ is called FASTQ Mapping to hg38.
- There are four methods of sending the raw data to YSEQ in FASTQ format to be converted to a BAM hg38. Consider which method of “To transfer the large sequencing data files you have several options:” is best for you.
Especially if you have a slow internet connection, it is recommended to choose point 4), so that YSEQ downloads the raw data from Dante Labs itself. - Order the FASTQ mapping and specify how you want to give YSEQ access to the FASTQ files.
- It may take a few days to weeks until your files are ready.
- Download The Files
- Upload the files with the extensions _hg38_chrY.bam and _hg38_chrM.bam to a cloud
- Share the folder and submit the URL to YFull.
1.2.2 Creating BAM hg38 with usegalaxy.eu yourself
You can also create the BAM hg38 yourself from the FASTQ files. You can do this on your own computer, but also on a remote computer from usegalaxy.
1.) Register an account on https://usegalaxy.eu/ and log in.
Please use usegalaxy.eu and not usegalaxy.org, because the latter has stricter limits which stop the generation of the BAM file. Usegalaxy.eu is operated by European universities.
2.) Now you have to look at the raw data to see how many FASTQ files you have – you can recognize them by the fact that their names end in .fq.gz.
If there are exactly two FASTQ files in total, then there is nothing more to do in this step, they are already in the right format – you can then continue with step 3.
If there are more than two files, you have to combine them to two files first.
This means that all files whose file names end in _1 (forward reads) must be merged into one file, then those ending in _2 (reverse reads) into a second file.
Now how do you merge several files into one?
If you feel technically fit enough to use the Windows command prompt, you can do this using the copy command, for example:
copy /B “1_1.fq.gz“ + “2_1.fq.gz“ + “3_1.fq.gz“ “1.fq.gz“
copy /B “1_2.fq.gz“ + “2_2.fq.gz“ + “3_2.fq.gz“ “2.fq.gz“
(This is just an example, if you only had three files at a time. In fact, there should be more).
From now on, use only these two FASTQ files, not the many others.
3.) On the left side (“Tools”) now click “Get Data”, then scroll down to “Upload file from your computer”.
Upload the two FASTQ files here. If you don’t have a fast internet access, you will unfortunately have to wait a long time until all uploads are completed.
4.) Wait until both files are completely uploaded.
On the left side (“Tools”) scroll down to “Mapping”, click on it, then click on “Map with BWA-MEM”.
5.) On the next page select the reference genome “hg38”, “Select first set of reads” –> first FASTQ file, “Select second set of reads” –> second FASTQ file, don’t change anything else, click “execute”.
6) 1-2 days later, the BAM file should be ready (visible after login), so you can theoretically download it to your hard disk (click on the new BAM at “History” on the right, then click on the disk icon).
If you want to submit the file to another server (e.g. YFull), it is easier to generate a usegalaxy link which you just pass on. This option follows in steps 7-9:
7.) Log in. On the right side, next to the “History”-logo, you can see a gear wheel. Click on it.
8) Select “Share or Publish”, then click on “Make history accesible via link”.
DO NOT click the option “[…] and publish” additionally, otherwise all other users of usegalaxy can see and access your files.
Finally click the option “Also make objects within the History accessible”.
9.) On the right side (“History”) click on the newly generated BAM file, then click on the disk icon, then right click on “Download dataset” and copy the link to the clipboard. This link is accepted by YFull and others.
A few days later, when YFull informs you by mail that you have successfully downloaded the file, log back in to usegalaxy.eu if necessary, click on the cogwheel and disable the share link again.
Thanks for this extremely useful and detailed information Antonios!
Pingback: YFull – First Steps – ΑΝΤΩΝΙΟΣ ΔΝΑ PROJECT
Thanks for this guide, it’s great! One question: My Dante fastq.gz files total 53.3 GB and their BAM file is 44.8 GB, while the hg38 BAM generated by usegalaxy.eu is only 37.9 GB. Should I be concerned?
To be honest, I am not an expert, so I can’t give you an answer with confidence. I never was concerned about the file size. I did create hg19 BAMs for YFull several times, so I did last week and all worked well.
There are great groups at Facebook, with experts, who could tell you, why the file size is different.